If you want to create an offer or event in your restaurant and require prepayment, follow these steps:
- Integrate a Payment Provider – Go to Settings > 3rd Party Integrations and connect a supported payment provider to your Tablein account.
- Access Prepayments and deposit – Navigate to Settings > Prepayments and Events.
- Create a New Event – Click "Create New" in the top right corner.
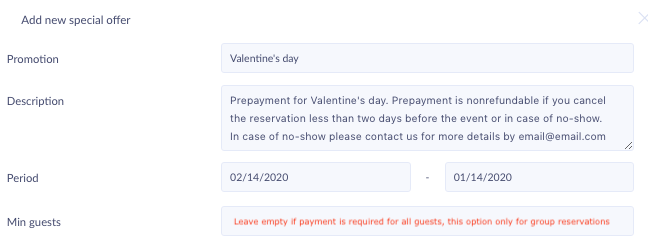
PromotionEnter a clear and engaging name for your event. This will be the primary title visible to customers during the booking process. DescriptionAppears after the event title and is included in emails.
This section helps set clear expectations and provides guests with all necessary details before attending. |

|
No-Show FeeIf you prefer to take prepayment instead of saving card details or simply display information without enforcing a charge, leave this setting off. |

|
PeriodSpecify the date or time period for which prepayment is required.
Ensure your settings align with your booking and payment requirements. |

|
Minimum GuestsUse this option to require prepayment only for groups larger than a specified size.
This ensures flexibility in your prepayment policy while securing reservations for larger groups. |
 |
Offer typeChoose the appropriate offer type. The prepayment function works for all types, with the only difference being the title displayed:
Select the option that best suits your promotion or reservation requirement. |

|
|
This feature allows you to set different fees for different dining areas in your restaurant.
This provides flexibility in managing prepayment or no-show fees based on the dining area selected by guests. |

|
Priority Settings
Use this setting to highlight your most important offer for customers. |

|
Information / Policy / Menu FileUpload a PDF file to provide detailed information about your special offer, event, or limited-time menu.
This feature ensures customers have all the necessary details before booking. |
%20table%20reservations%20%20Tablein%202025-02-06%20at%201.24.00%20PM.png?width=327&height=701&name=Tablein%20Demo%20restaurant%20(Main%20street)%20table%20reservations%20%20Tablein%202025-02-06%20at%201.24.00%20PM.png)
|