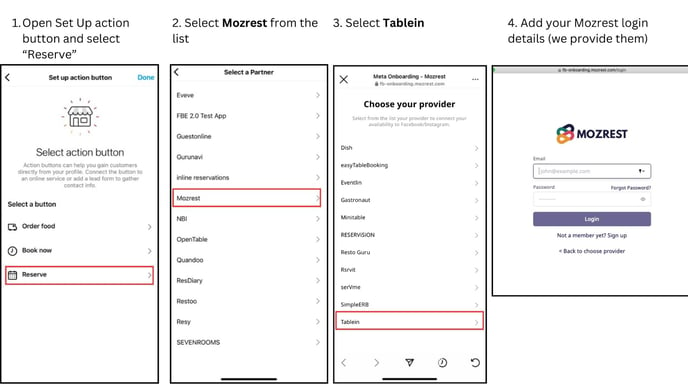
Facebook and Instagram integration
The Facebook page must be linked to the Instagram page.
Please note that the restaurant must have both Facebook and Instagram Business accounts and connect them with each other. This is a requirement from the META group, and if the accounts are not connected, the button may not appear. Learn how to connect Facebook with Instagram.
Since we are partnered with Mozrest for this integration, you will need credentials. Please contact us via live chat or email at support@tablein.com to receive the necessary credentials for the integration.
Facebook integration
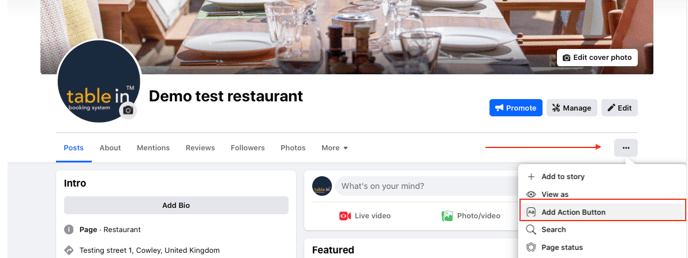
Step 1: Once both the Facebook and Instagram accounts are connected. Click on the three dots. Then, click 'Add Action Button'.
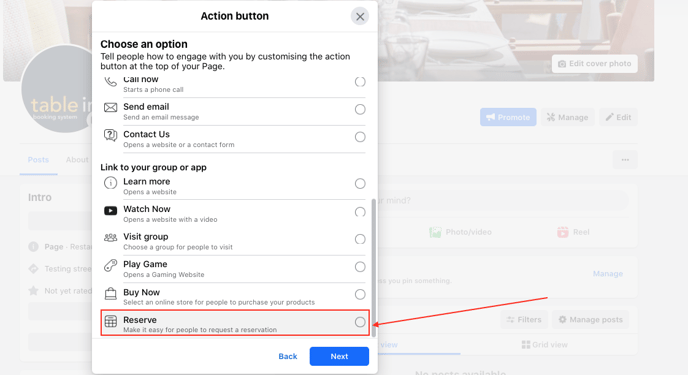
Step 2: Choose 'Reserve' from the list of action buttons.
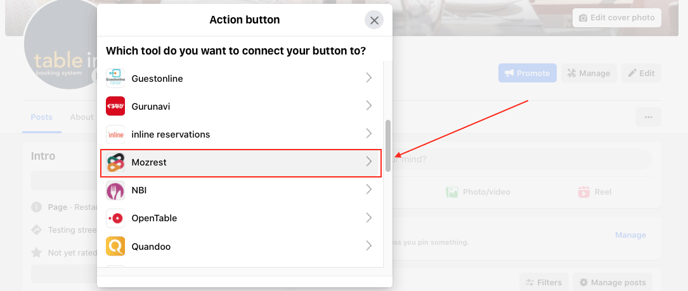
Step 3: Select 'Mozrest' from the list and click 'Continue' to grant necessary permissions to Mozrest.
Step 4: Select Tablein to initiate the single sign-on process.
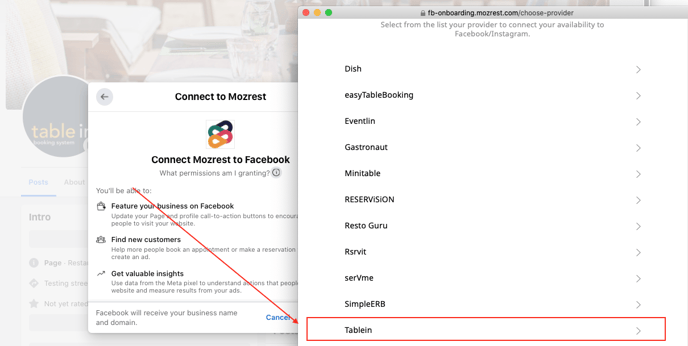
Step 5: Log in using your credentials you received from us. If you haven't received yet, please contact us via live chat or email at support@tablein.com to receive the necessary credentials for the integration.
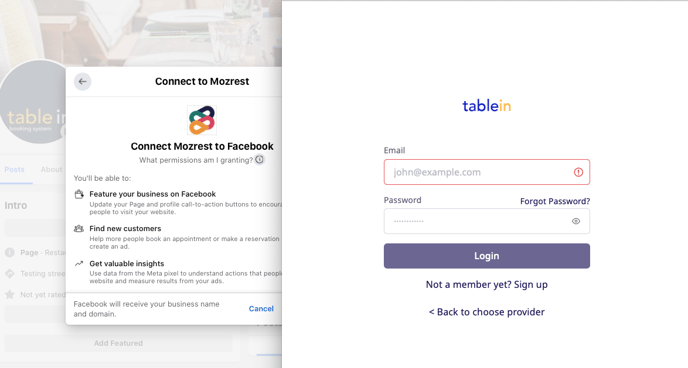
Step 6: Select 'A restaurant' to connect a facebook/instagram account to
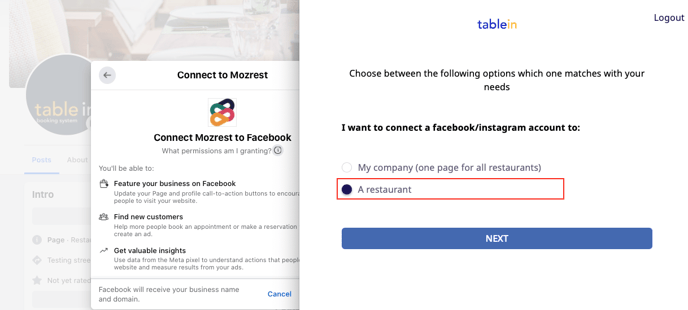
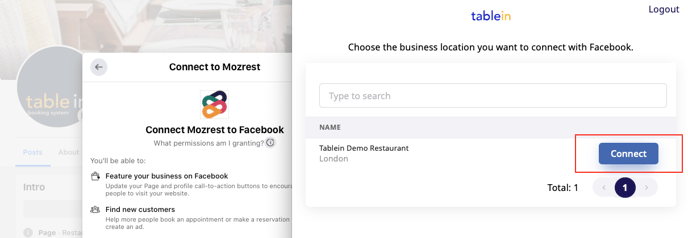
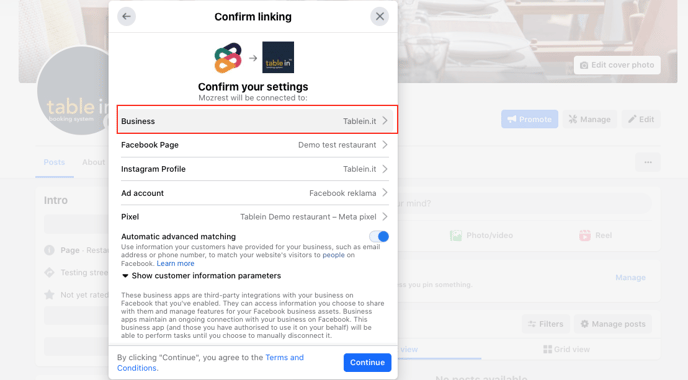
Step 8: Click 'Continue' to complete the integration.
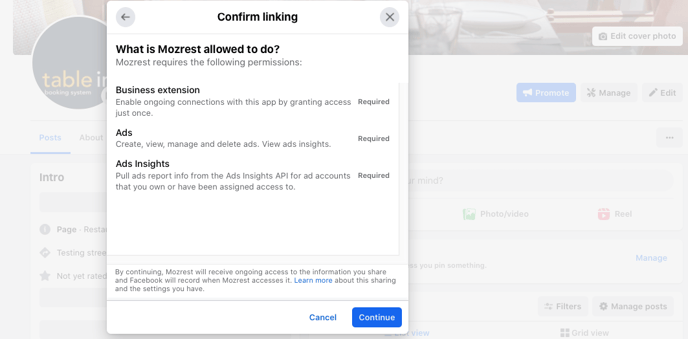
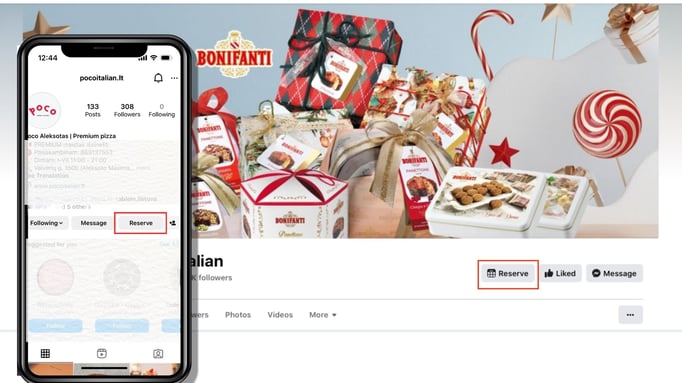
Step 9: Once successful, you will be able to see the 'Reserve' button on your Facebook page. When you select “View As” under the same three dots.
If you encounter any problems with the connection, please contact us via live chat or email at support@tablein.com.
Instagram Integration
The Instagram page must be linked to the Facebook page.
Step 1: Go to the ‘Edit Profile’ page.
Step 2: Find the option of adding an ‘Action Button’ at the bottom.
Step 3: Select on "Reserve" to continue.
Step 4: Select “Mozrest” to continue (Find it by scrolling down).
Step 5: Choose your Tablein from the list.
Step 6: Enter your login credentials (received from us) to continue.
Step 7: Choose One Restaurant to continue
Step 8: Select the restaurant you want to connect to.
Step 9: Click on continue.
Step 10: Click on continue.
Step 11: Click on the “tick” to confirm (You can also see that the current button is set to “reserve”.
Step 12: You can see the “reserve” button has appeared on the page.
