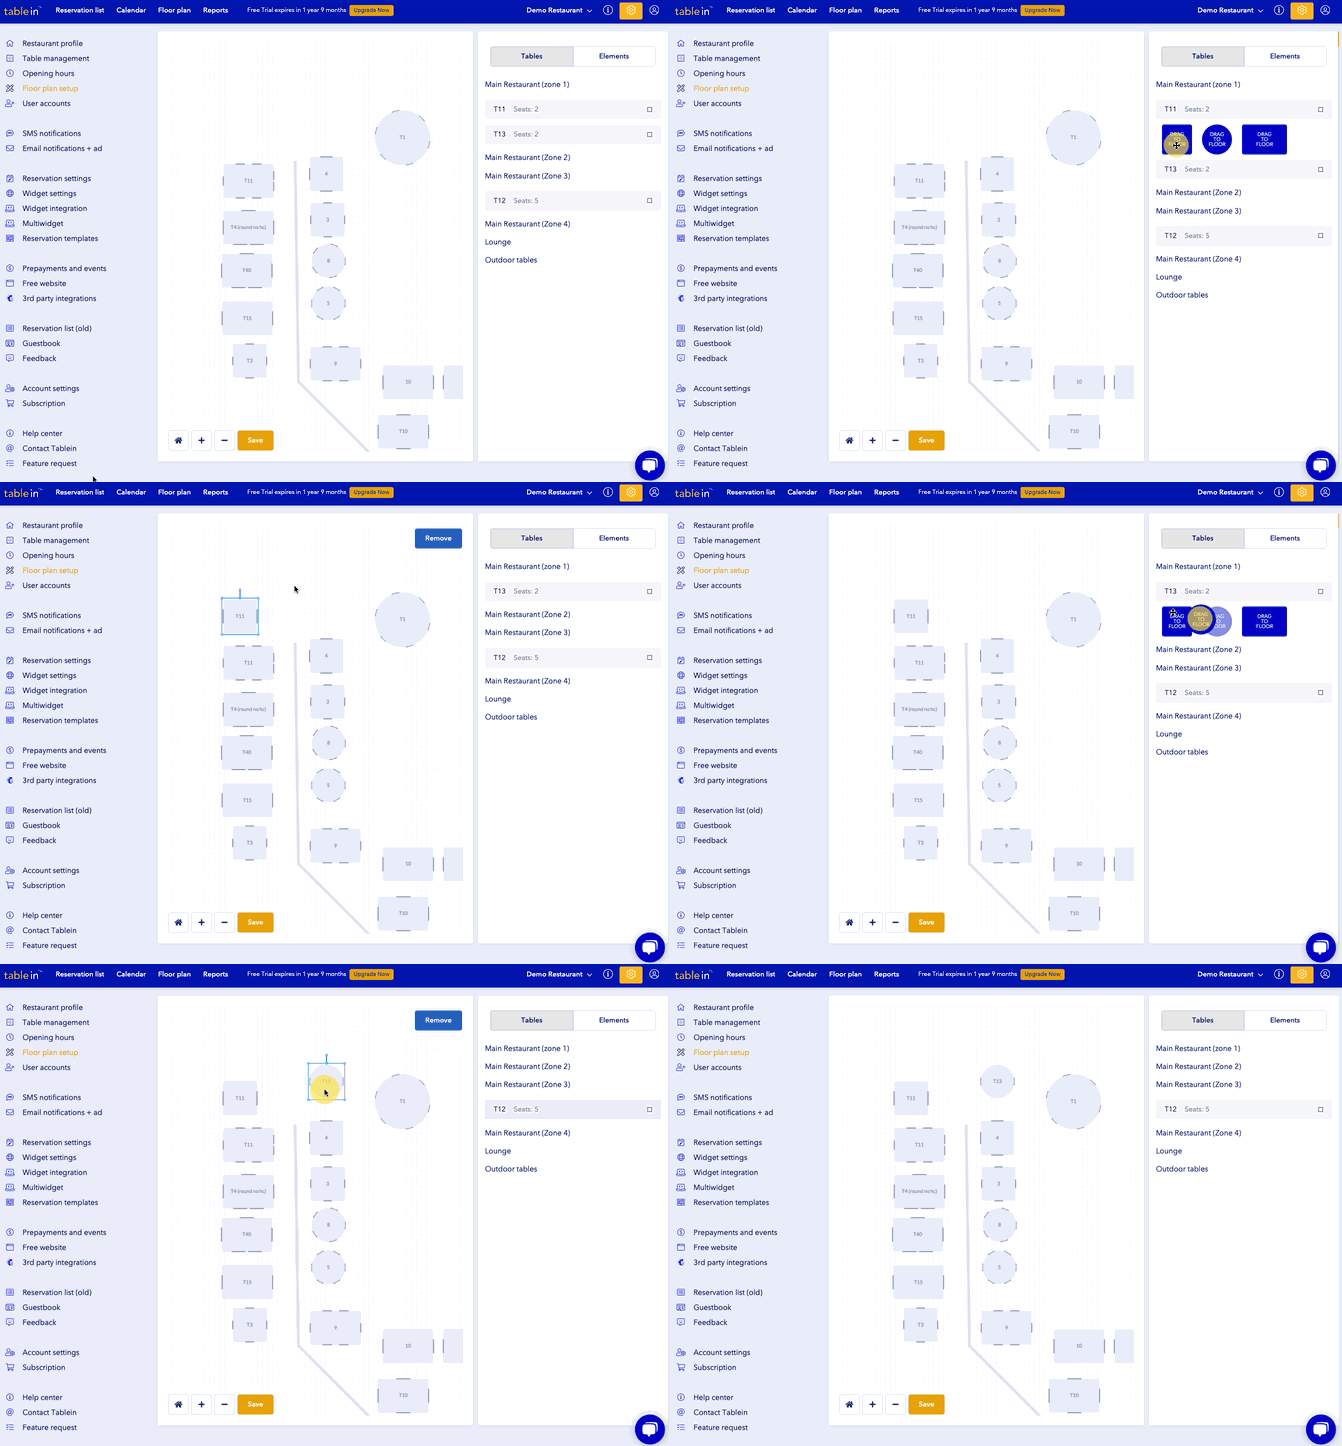
Setting up the floor plan
Floor plans must be created through a PC or laptop and cannot be added from an iPad, tablet, or phone.
By creating a clear floor plan, you’ll have a versatile and easy-to-manage restaurant space, which allows you to accommodate groups of all sizes with minimum fuss.
Here’s how:
- Open Floor Plan Setup
- Select a Table and Table Shape from the sidebar (on the right-hand side).
If you want to create more or edit tables, it must be done in Table management) - Simply drag and drop your tables onto the floor plan to create your desired layout
- To rotate or resize the tables, use the knob that can be found next to each one
- Create walls or add text to your floor plan by using the “Elements” option in the sidebar
- Make sure you move all tables from the sidebar into your layout
- Zoom In, Zoom Out and Scale to Fit options make the process much easier to use
- Don’t forget to click Save
NOTE! Our system doesn’t allow separate floors. You can separate different areas with elements, such as walls and text instead. This allows you to overview all of your reservations and tables at a glance, without switching layouts.
